
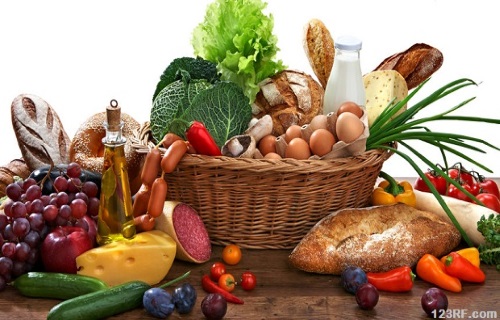
In the past, the arrival of fall meant a scramble to harvest and preserve as much food as possible before the cold weather set in. Most families would spend many long hours working on this enormous task because their year-round access to food depended on it. Only in recent decades have we become reliant on the convenience of refrigerators, which are wonderful for keeping food fresh — until the power goes out. Then a mad scramble of another sort ensues – trying to eat as much of the food before it goes bad within a day or two.
Since outages happen all the time and increasingly violent storms keep the power out for longer, we could do well to relearn the food preservation techniques of our ancestors that do not rely on electricity. There are several great and effective alternatives to refrigeration that are easy to learn.
Canning is a traditional method of preservation that partially cooks food to kill bacteria and seals it up until you’re ready to eat it. The food can be eaten right away, unless you make pickles, which usually require a couple weeks for flavour to develop properly.
There are multiple stages of work required for canning, i.e. preparing the food and any additives such as brine or sugar syrup, sterilizing glass jars and lids, filling and processing, wiping down and storing the filled jars. It can take a long time, but it’s a skill that becomes quicker the more you do.
While the upfront cost of jars can be expensive, they have an extremely long life span. (My grandmother has been using the same jars for decades.) All you have to replace is the snap lids that seal in the food, and those don’t cost much.
Canning, whether it’s making fruit jam or pickling vegetables, gives me a lot of satisfaction. The more I do, the easier and more efficient it gets. Recently, my grandmother lamented that canning is a dying art, but I disagreed and told her that I think more people are starting to see the value in processing seasonal produce to enjoy all year round. Here are some of the reasons why I think a growing number of people are incorporating canning into their summer routines.

1. Canning is almost zero-waste
You can reuse the same glass jars and screw lids year after year. The only new item needed is snap-lids, since you must have a fresh, new seal in order to keep the food properly preserved.
2. Canning is a way to preserve the freshest local produce
Fruits and vegetables are always best when eaten in their proper season, and canning enables you to keep that wonderful taste of early summer strawberries and late summer peaches to enjoy in the middle of winter. Nothing at the supermarket can compare.
3. Canning at home allows you to keep additives out of your food
When you can at home, you know exactly what’s going into those jars. Most recipes require minimal ingredients – just fruit, sugar, and lemon for jams, and vinegar, salt, and spices for pickles. You won’t need to worry about extra sodium or unrecognizable ingredients or BPA in store-bought cans.
4. Canning teaches kids about where their food comes from
Many kids think that food just comes from the supermarket. Explain to them how the seasons work, and how certain foods grow and ripen naturally at particular times of the year. Take them to pick fruit, which is a fun family activity.
5. Canning helps you to support local farmers and reduce food miles
Pick-your-own fruit farms are everywhere , but you can also buy large baskets of produce directly from farmers. The smaller quantities sold in stores tend to be much more expensive. By buying and canning at home, you will reduce the total number of miles that your food has travelled to get to your table, and its accompanying carbon footprint.
6. Canning can save you a lot of money
Buy fresh produce in bulk, and ask your local farmer if you can get cheaper ‘seconds,’ which are slightly bruised, damaged, or ugly produce. By reusing the same glass jars and screw-top lids every year, you’ll have minimal costs associated with canning each year – certainly less than if you were to buy the same items in cans or jars at the supermarket.
7. Canning means you’ve got the perfect homemade gift on hand at all times
People love homemade preserves, jams, and pickles, which makes them the perfect hostess gift or stocking stuffer. One of my favourite wedding gifts was a huge basket full of homemade jams, jellies, and chutneys, which I enjoyed eating for months afterward.
8. There is food security in canning
There is something deeply satisfying about storing food for future consumption and knowing it’s always there. I think it’s a good idea to minimize one’s dependence on the corporate grocery and Big Ag food world. Canning is a way to stay off the ‘food grid’ as much as possible. Jars also won’t go bad in the case of an unexpected power outage.
9. The act of canning carries on an age-old tradition
It’s only in the past generation that canning has fallen to the wayside. For centuries, people had to preserve their own food out of necessity, but now we’ve become so dependent on a larger food system that canning hardly seems worth the effort. It’s a skill, however, that’s worth preserving.
Safe Canning Methods
There are two safe ways of processing food, the boiling water bath method and the pressure canner method:
-
- The boiling water bath method is safe for tomatoes, fruits, jams, jellies, pickles and other preserves. In this method, jars of food are heated completely covered with boiling water (212°F at sea level) and cooked for a specified amount of time
- Pressure canning is the only safe method of preserving vegetables, meats, poultry and seafood. Jars of food are placed in 2 to 3 inches of water in a special pressure cooker which is heated to a temperature of at least 240° F. This temperature can only be reached using the pressure method. A microorganism called Clostridium botulinum is the main reason why pressure processing is necessary. Though the bacterial cells are killed at boiling temperatures, they can form spores that can withstand these temperatures. The spores grow well in low acid foods, in the absence of air, such as in canned low acidic foods like meats and vegetables. When the spores begin to grow, they produce the deadly botulinum toxins(poisons).
The only way to destroy these spores is by pressure cooking the food at a temperature of 240°F, or above, for a specified amount of time depending on the type of food and altitude. Foods that are low acid have a pH of more than 4.6 and because of the danger of botulism, they must be prepared in a pressure canner.
The low acidic foods include:
- meats
- seafood
- poultry
- dairy products
- all vegetables
High acid foods have a pH of 4.6 or less and contain enough acid so that the Clostridium botulinum spores can not grow and produce their deadly toxin. High acidic foods can be safely canned using the boiling water bath method.
The high acidic foods include:
- fruits
- properly pickled vegetables
Certain foods like, tomatoes and figs, that have a pH value close to 4.6 need to have acid added to them in order to use the water bath method. This is accomplished by adding lemon juice of citric acid.
The mechanics behind canning are fairly simple. You fill a clean jar with prepared food, apply the flat lid and the threaded ring to the jar and submerge the filled jar in boiling water for a prescribed amount of time (times vary widely, depending on what you’re canning). When you remove the hot jar from the water, the heat begins to escape, taking with it any air left in the jar. The escaping oxygen pulls the lid down, creating an airtight seal. A food-safe sealing compound embedded into the lid aids in the maintenance of the seal. High-acid food preserved in this manner will keep happily for at least a year.

In the last 60+ years, as food production became heavily industrialized and the full-service grocery store became the norm, home canning experienced a drastic drop-off in popularity. It went from being a seasonal necessity (how else would you preserve the bounty of your kitchen garden and fruit trees?) to a neglected art, still practiced in more rural areas, but nearly abandoned by city dwellers.
Thanks to the soft economy, concerns over industrial food safety and a desire among many of us to have more control about what’s in our food, home canning has once again become popular. However, for those who didn’t grow up watching their mothers or grandmothers, the process can be intimidating. Take heart! It’s not nearly as hard as you think.
What You’ll Need

To get started canning, take stock of your current kitchen supplies. You should gather:
- Tongs
- A wide-mouth funnel
- A variety of measuring cups
- A jar lifter*
*If you’re going to do a lot of canning, I do recommend this tool. It’s saved me from a number of hot water burns over the years.
Vessels: A large, wide, non-reactive pot like an enameled Dutch oven is a good vessel for cooking preserves. A deep stockpot makes an excellent canning pot. Just pop a round rack or kitchen rag into the bottom of the pot so that the water can circulate fully around the jars.
Let’s Get Canning!

Here’s how you do the actual work of canning.
Find a recipe from a reliable source like the Ball website, the National Center for Home Food Preservation or a cookbook with tested recipes. Gather your ingredients. Always work with the freshest produce you can find.
Remove lids and rings from jars. Place the number of jars you’ll need on top of the rack in your stock pot. Fill pot (and jars) with water to cover, place a lid on the pot and bring it to a boil. Put your lids in a small saucepan and bring them to the barest simmer on the back of the stove.

While the canning pot comes to a boil, prepare your product. When your recipe is complete, remove the jars from the canning pot (pouring the water back into the pot as you remove the jars) and lay them out on a clean towel on your counter.
Carefully fill your jars with your product. Depending on the recipe, you’ll need to leave between ¼ and ½ an inch of headspace (that’s the room between the surface of the product and the top of the jar).

Wipe the rims of the jar with a clean, damp paper towel or the edge of a kitchen towel. Apply lids and screw the bands on the jars to hold the lids down during processing.
Carefully lower the filled jars into the canning pot. You may need to remove some water as you put the jars in the pot. A heat-proof Pyrex measuring cup is the best tool for this job.

Once the pot has returned to a boil, start your timer. The length of the processing time will vary from recipe to recipe. When your timer goes off, remove the jars from the water bath promptly. Place them back on the towel-lined countertop and let them cool.
The jar lids should begin to ping soon after they’ve been removed from the pot. The pinging is the sound of the seals being formed and the center of the lids will become concave as the vacuum seal takes hold.

After the jars have cooled to room temperature, remove the bands and check the seals. You do this by grasping the jar by the edge of the lid and gently lifting it an inch or two off the countertop. The lid should hold fast.
Once you’ve determined that your seals are good, remove the rings and wash the jars well to remove any sticky residue. Store your jars in a cool, dark place (with the rings off, please) for up to a year. Jars that don’t seal can be refrigerated and used first.
Uh Oh.. Troubleshooting

Why didn’t my jars seal?
This happens for a few different reasons.
- There may have been a bit of product on the rim of the jar, making it hard for the lid to get a good hold.
- The sealing compound on the lid wasn’t fully softened before you applied it.
- Was your product piping hot when it went into the jars? If not, there may not have been enough heat in the jar to create the necessary vacuum effect.

Help! I seem to have lost some product during processing!
This is a normal experience, known as siphoning. It happens sometimes when a hot jar experience rapid temperature change. The swift cooling can sometimes force product out of the jar. It’s not something to worry about unless it interferes with the seal. Just wash your jars well and store as usual.
To prevent it in the future, take care to remove all trapped air bubbles inside the jar before canning. You can also let jars sit in the canner for a few minutes when the time is up, off the heat and with the lid removed, so that the temperature change isn’t as shocking to the jars.
Learning to cook from your deep pantry can made easier with the following books:
The Lost Ways (Learn the long forgotten secrets that helped our forefathers survive famines,wars,economic crisis and anything else life threw at them)
Our grandfathers had more knowledge than any of us today and thrived even when modern conveniences were not available. They were able to produce and store their food for long periods of time. The Lost Ways is the most comprehensive book available. All the knowledge our grandfathers had, in one place.Here’s just a glimpse of what you’ll find in the book:
Table Of Contents:
Making Your Own Beverages: Beer to Stronger Stuff
Ginger Beer: Making Soda the Old Fashioned Way
How North American Indians and Early Pioneers Made Pemmican
Wild West Guns for SHTF and a Guide to Rolling Your Own Ammo
How Our Forefathers Built Their Sawmills, Grain Mills,and Stamping Mills
How Our Ancestors Made Herbal Poultice to Heal Their Wounds
What Our Ancestors Were Foraging For? or How to Wildcraft Your Table
How North California Native Americans Built Their Semi-subterranean Roundhouses
Our Ancestors’Guide to Root Cellars
Good Old Fashioned Cooking on an Open Flame
Learning from Our Ancestors How to Preserve Water
Learning from Our Ancestors How to Take Care of Our Hygiene When There Isn’t Anything to Buy
How and Why I Prefer to Make Soap with Modern Ingredients
Temporarily Installing a Wood-Burning Stove during Emergencies
Making Traditional and Survival Bark Bread…….
Trapping in Winter for Beaver and Muskrat Just like Our Forefathers Did
How to Make a Smokehouse and Smoke Fish
Survival Lessons From The Donner Party
Get your paperback copy HERE
Here’s just a glimpse of what you’ll find in The Lost Ways:
From Ruff Simons, an old west history expert and former deputy, you’ll learn the techniques and methods used by the wise sheriffs from the frontiers to defend an entire village despite being outnumbered and outgunned by gangs of robbers and bandits, and how you can use their wisdom to defend your home against looters when you’ll be surrounded.
Native American ERIK BAINBRIDGE – who took part in the reconstruction of the native village of Kule Loklo in California, will show you how Native Americans build the subterranean roundhouse, an underground house that today will serve you as a storm shelter, a perfectly camouflaged hideout, or a bunker. It can easily shelter three to four families, so how will you feel if, when all hell breaks loose, you’ll be able to call all your loved ones and offer them guidance and shelter? Besides that, the subterranean roundhouse makes an awesome root cellar where you can keep all your food and water reserves year-round.
From Shannon Azares you’ll learn how sailors from the XVII century preserved water in their ships for months on end, even years and how you can use this method to preserve clean water for your family cost-free.
Mike Searson – who is a Firearm and Old West history expert – will show you what to do when there is no more ammo to be had, how people who wandered the West managed to hunt eight deer with six bullets, and why their supply of ammo never ran out. Remember the panic buying in the first half of 2013? That was nothing compared to what’s going to precede the collapse.
From Susan Morrow, an ex-science teacher and chemist, you’ll master “The Art of Poultice.” She says, “If you really explore the ingredients from which our forefathers made poultices, you’ll be totally surprised by the similarities with modern medicines.” Well…how would you feel in a crisis to be the only one from the group knowledgeable about this lost skill? When there are no more antibiotics, people will turn to you to save their ill children’s lives.
If you liked our video tutorial on how to make Pemmican, then you’ll love this: I will show you how to make another superfood that our troops were using in the Independence war, and even George Washington ate on several occasions. This food never goes bad. And I’m not talking about honey or vinegar. I’m talking about real food! The awesome part is that you can make this food in just 10 minutes and I’m pretty sure that you already have the ingredients in your house right now.
Really, this is all just a peek.
The Lost Ways is a far–reaching book with chapters ranging from simple things like making tasty bark-bread-like people did when there was no food-to building a traditional backyard smokehouse… and many, many, many more!

Books can be your best pre-collapse investment.
The Lost Ways (Learn the long forgotten secrets that helped our forefathers survive famines,wars,economic crisis and anything else life threw at them)
Survival MD (Best Post Collapse First Aid Survival Guide Ever)
Conquering the coming collapse (Financial advice and preparedness )
Liberty Generator (Build and make your own energy source)
Backyard Liberty (Easy and cheap DIY Aquaponic system to grow your organic and living food bank)
Bullet Proof Home (A Prepper’s Guide in Safeguarding a Home )
Family Self Defense (Best Self Defense Strategies For You And Your Family)
Survive Any Crisis (Best Items To Hoard For A Long Term Crisis)
Survive The End Days (Biggest Cover Up Of Our President)
SOURCE : treehugger.com – seriouseats.com