
MAKE A $20 OZONE GENERATOR AN OZONE WATER INJECTOR
Need some cheap ozone? Here’s an experimental ozone generator based on readily available parts that you can build cheaply to clean up the air in your surroundings or get rid of strong odours. I think the latter will appeal to the people who grow exotic herbs in their homes, or live in damp climates where mould is a problem.
This project generally works well, but it’s output depends on the components used. It’s also very much a bare-bones experimental device so you build it entirely at your own risk.
This project generates ozone using corona discharge. This involves generating a high voltage electrical discharge and then blowing air past it. As the air passes through the corona the oxygen molecules are temporarily separated into individual oxygen atoms and when clear of the corona they start to recombine back into oxygen (O2) and ozone (O3). Since ozone is unstable it will readily donate the extra atom of oxygen to anything that will take it, and this results in a strong oxidising effect which can destroy odours and kill airborne viruses and mould.
Ozone has a very short lifetime, typically reverting back to oxygen again within an hour.
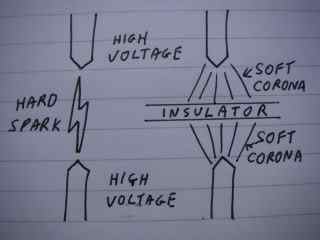
The most efficient way of creating ozone is with corona discharge. To create a controlled corona discharge you place an insulator between two high voltage electrodes. Without the insulator the current will arc between the electrodes and generate some ozone but also produce a lot of heat. With the insulator in place the current can’t arc directly across and instead a charge is transferred back and forth in the style of a capacitor with the charge manifesting itself as a purple corona discharge. This requires the use of AC and you can get more corona in a smaller area using high frequency AC

A very common method of producing corona in a very compact form is the use of a corona plate. This is a piece of thin ceramic or glass with an electrode on each side that mirrors the other side without any significant overlap. When a high voltage is applied across the electrodes a corona line forms at the points where the top and bottom electrodes would touch if the insulator was not in the way. This arrangement is extremely efficient since the insulator can be very thin and this allows use of a much lower voltage, typically one to two kilovolts per millimetre.
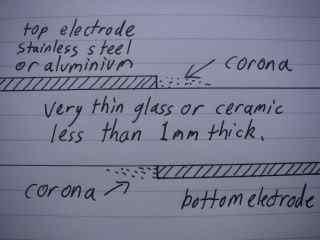
The insulating material must be able to stand up to the high voltage, corona discharge and ozone, so it is generally glass or ceramic with ceramic the most common choice. The electrodes must also be able to withstand the arduous corona and ozone environment and would ideally be stainless steel with aluminium also being fairly suitable.
This is an example of a typical manufactured corona plate. The bottom electrode is mirrored on the back so that there is minimal overlap, and the high voltage is connected to the plate by the same spring clips that hold it in place.
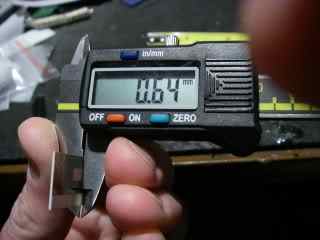
As you can see, the ceramic is very thin at less than a millimetre. One of the main benefits of ceramic plates is that they have a very high dielectric strength, which basically means they can handle a much higher voltage without arcing through.
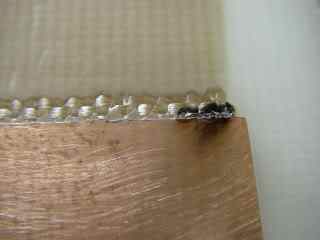
This was the result of an experiment I did with a bit of very thin PCB laminate with copper electrodes etched on either side. It worked for several hours with the corona visibly destroying the resin that bonds the glass fibre together, until it suddenly arced through. When a plate fails the current will all tend to arc through in one small point and cause a lot of heat in that area.
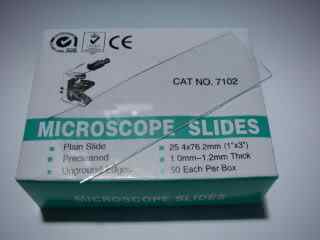
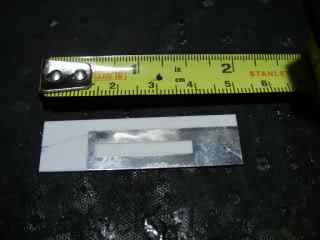
In my search for suitably thin insulating material to make cheap corona plates from I completely failed to find thin ceramic sheet at anything near an affordable price. Instead I found that glass microscope slides are pretty good with a thickness of about 1mm. I also tried large slide covers that were a very fragile .2mm thick, but they were very hard to apply the electrodes to without breaking them, and also failed electrically at about 2kV.

There are a few electrode arrangements you can make that determine the number of corona lines and thus the corona output, although that will also be determined by the output current capability of your high voltage supply.
I’ve shown two electrode arrangements, with yellow tape representing the bottom electrode and blue representing the top one. I’ll mention again that there should not be excessive overlap, since any overlap will just pass AC current like a capacitor without producing any corona.
In the above designs the two part version produces two lines of corona (one top and one bottom) while the three part electrode arrangement produces four lines of corona. Try the simple two electrode version first though, since it’s much easier to make.
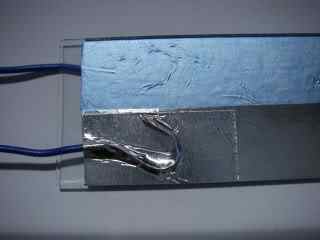
I used self adhesive aluminium foil for my prototype. I started by applying a piece over half the glass plate as shown above.
I then used a sharp knife to cut and peel the ends away from either side so that there was no risk of arcing around the side of the glass if the electrodes were too close to the edge.
Then I used the knife to trim away the excess foil by slicing it against the glass. (Quite a satisfying slicing action I should add.)

Then I put an identical electrode on the other side making sure to align the edges on either side accurately without too much overlap.
Aluminium is extremely hard to bond wires to, so I simply stripped some thin stranded wires and formed loops.
Then stuck them onto the electrodes with more aluminium tape. this should be fairly reliable, since the current is very low.
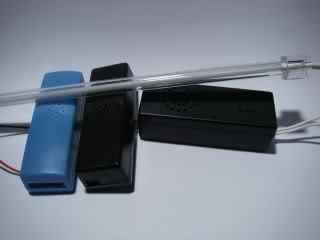
The easiest source of a modestly high voltage supply was from a cold cathode kit as sold for modding PC cases. I got mine from an online site called ebuyer in the UK, and it came with two rather neat 12″ (300mm) blue cold cathode tubes.
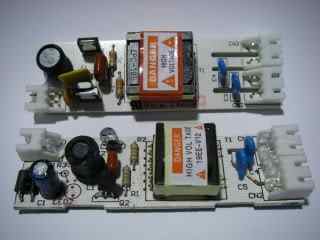

Most of these 12V cold cathode supplies are very similar inside. They have a simple push-pull transformer driver with feedback windings, and a high voltage output that is usually divided into two outputs using high voltage series capacitors which also serve to limit the current through each tube.
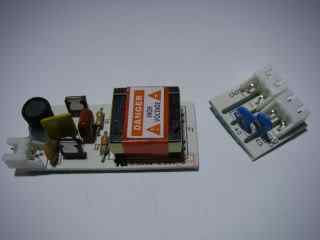
I cut the two output capacitors off since they interfered with the operation.
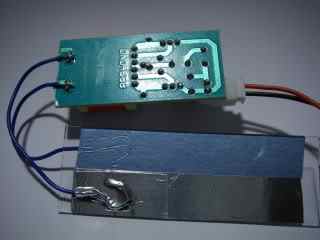
And connected my home built corona plate directly across the output of the high voltage transformer.

When powered up, a thin line of purple corona should appear on both sides where the electrodes meet. If it’s just a few patches of corona then you could try boosting the supply voltage up from 12V to 14V, although going higher may risk causing the high voltage transformer to fail internally. These little power supplies are not designed for open circuit operation like this, so don’t push them too hard.
At this point you should be smelling ozone as a fresh smell a bit like chlorine bleach (also a strong oxidiser).
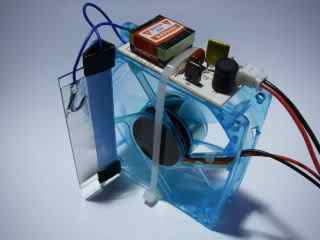
And here’s the finished unit. It uses a standard 12V case fan to push air across the corona and mix the resulting ozone into the rooms air. The corona plate is attached to the fan with two bits of binding strip normally used to hold documents together. I put a blank glass plate in it to align the two bits, then glued them to the fan with resin. (Cheers to Adam Aglionby for the mounting suggestion.) A proper mounting clip would have been nice, particularly one that also made the connections onto the plate.
I powered the whole assembly from an ordinary linear plug-in power supply which was rated at 12V 500mA. I deliberately used an unregulated supply running at less than full load to try and nudge the output voltage up a bit for a better corona.
It works well and soon makes a strong smell of ozone permeate my large flat which means there’s actually too much ozone being generated for an occupied area. The output can be tamed down if you reduce the voltage a bit. You should be able to guage ozone output by looking at the corona in a dark room. For low levels it may even just be a few small patches here and there on the plate.
Alternatively you can run the unit on a time switch to cycle it on and off at various points throughout the day.
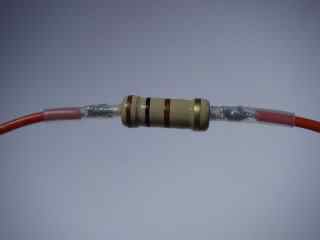
I added a 100 ohm 1W resistor in series with the fan I used to make it run quieter at the expense of airflow. This is only needed if you want to use the assembly in a quiet area where the whoosh of the fan could cause annoyance.
Although this unit uses high voltage it is at low current and high frequency, so if you should make contact with the high voltage side it is not really dangerous. Do keep in mind that if anything goes wrong then the high voltage could arc and cause sustained smouldering of whatever failed. As such, make sure that the unit is not used near anything flammable.(source )
How to Build an Ozone Water Injector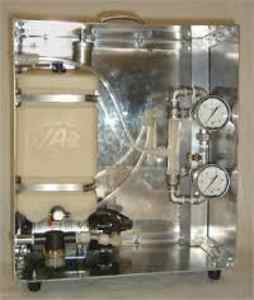
By Joe McElroy
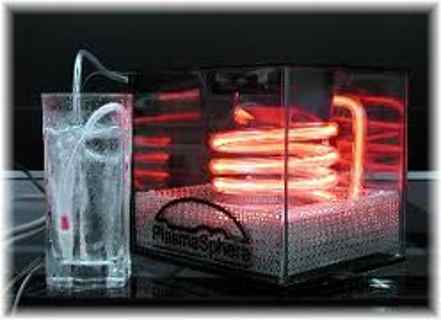
Building a home ozone water injector is a simple process. Industrial processes that require large amounts of highly purified water often use large, industrial ozone injectors. The process is simple even when the equipment is imposing. All that’s required are an ozone generator, a delivery system and a tank or bottle of water. Ozone generators use no chemicals, only electricity and water. They leave no dangerous residue. Excess ozone in a small home water purifier is easily and naturally converted back into simple oxygen.
Instructions
1 Insert one end of the hose into the output connection of the ozone generator.
2 Weight the other end of the hose with a cylinder, or several washers, that will not crimp the opening. Glue a small sea sponge to the weighted end of the hose and place this in the bottom of the tank or large bottle of water. This will disperse the bubbling action throughout the tank and more quickly purify the water. Most simple home water ozone systems that are commercially available already have a weighted dispersal mechanism fitted to the hose.
3 Turn the generator on and let the ozone bubble through the water. It takes about 15 minutes to completely purify a gallon of water.(source)
Other useful resources:
Survival MD (Best Post Collapse First Aid Survival Guide Ever)
Backyard Innovator (A Self Sustaining Source Of Fresh Meat,Vegetables And Clean Drinking Water)
Blackout USA (EMP survival and preparedness)
Conquering the coming collapse (Financial advice and preparedness )
Liberty Generator (Build and make your own energy source)
Backyard Liberty (Easy and cheap DIY Aquaponic system to grow your organic and living food bank)
Bullet Proof Home (A Prepper’s Guide in Safeguarding a Home )
Family Self Defense (Best Self Defense Strategies For You And Your Family)
Sold Out After Crisis (Best 37 Items To Hoard For A Long Term Crisis)
SOURCE : bigclive.com
SOURCE : www.ehow.com