
The Pioneer Vegetable Garden
Long before the arrival of European settlers, the Cherokee and other tribes in the mountains of the Southern Appalachians were cultivating pumpkins and tobacco and planting beans and squash among the corn. From the Spanish explorers of the 16th and 17th centuries, the native people acquired horses, cattle, peaches, and other crops.
Pioneer families relied on poultry for three major purposes: meat, eggs, and money. Most pioneers who raised pigs built a smokehouse to help preserve the pork. In 1850, barns were of less significance to the farm than in later years. Pioneers used barns to store tools and some crops, rather than to house animals. The big barns that are associated with modern farms were not built in Iowa until the 1870s.
In principal, practitioners of natural farming maintain that it is not a technique but a view, or a way of seeing ourselves as a part of nature, rather than separate from or above it. Accordingly, the methods themselves vary widely depending on culture and local conditions.
Natural farming recognizes soils as a fundamental natural asset. Ancient soils possess physical and chemical attributes that render them capable of generating and supporting life abundance. It can be argued that tilling actually degrades the delicate balance of a climax soil.
In 1951, Newman Turner advocated the practice of “fertility farming”, a system featuring the use of a cover crop, no tillage, no chemical fertilizers, no pesticides, no weeding and no composting. Although Turner was a commercial farmer and did not practice random seeding of seed balls, his “fertility farming” principles share similarities with Native American system of natural farming. Turner also advocate a “natural method” of animal husbandry.
By the time the early pioneers arrived in the region, Native Americans were living in agricultural societies of great complexity. Their influence on pioneers was profound, as the newcomers learned about native crops and adopted local methods of cultivation.
Native American
Recent research in the field of traditional ecological knowledge finds that for over one hundred centuries, Native American tribes worked the land in strikingly similar ways to today’s natural farmers. Author and researcher M. Kat Anderson writes that “According to contemporary Native Americans, it is only through interaction and relationships with native plants that mutual respect is established.”
Three Sisters in the Body:
Corn is rich in carbohydrates; beans are packed with protein; squash contains large doses of vitamin A and other nutrients. The three together provide a balanced and nutritious meal.
What’s more, corn, beans, and squash are intended by nature to be eaten together. Certain vitamin, mineral, and amino compounds in these vegetables are unlocked or enhanced only when eaten together. The sisters continue to give their gifts, even in the body.
Three Sisters in American History:
Native Americans invented, or innovated, this method of companion planting while Europeans were still in the Dark Age. Much Indian lore and mythology rose around the sisters. But I am not so interested in lore. I care about growing delicious food.
The European settlers in early America cared a great deal about growing food. The autumn harvest could offer another season of life; or a slow painful death of starvation in the wilds.
Each Thanksgiving, we celebrate the story of Indians providing food to the Pilgrims to nourish them through the winter. The food the Indians gave was corn, beans, and squash.
However, the real gift, the profound life-saving gift, that Indians shared with the settlers was the secret of the three sisters. Companion planting enabled pioneer settlements, from Jamestown to Plymouth Rock, to vastly increase their food production.

Plants for Healing
The Cherokee have a long tradition of using plants for healing and preventive medicine. Wild herbs and other plants were gathered carefully, with the harvester taking only the fourth plant and leaving behind a gift of gratitude, such as a small bead.
Plants used by Cherokee healers include blackberry, black gum, hummingbird blossoms, cattail, greenbriar, mint, mullein, sumac, wild ginger, wild rose, yarrow, and yellow dock.
Pioneer Farming
Farming has been an important part of American history for a long time. Farming was never more essential than in the pioneer clays during the first half of the nineteenth century. Pioneer farmers, like farmers today, took risks. The only thing that has really changed since then is the farming technology. For example, if you are lucky, the proper amount of rain falls and a good harvest results. Then again, you can be unlucky, suffer a drought, and your crops wither and die. To this day, farming is very difficult and consists of hard work, dedication, and more than a little cooperation from the weather.
In 1800 seventy-five percent of the people in Illinois were involved in farming in some way. In 1850 sixty percent were involved, and by 1900 forty percent were involved. The most common crops grown were corn, wheat, barley, oat, rye, potatoes, and flax. Pioneer farmers grew a wider variety of crops and raised a wider assortment of livestock than modern-day farmers.
In 1818 the new state of Illinois had the lowest population in the nation. Only a few people lived in the northern part of Illinois. The main population was concentrated in the southern part of the state.
The first job of every pioneer farmer was to establish a garden to insure that the family had vegetables. Some of the more common vegetables grown in gardens were beans, peas, squash, pumpkins, radishes, mustard, lettuce, carrots, cucumbers, and melons.
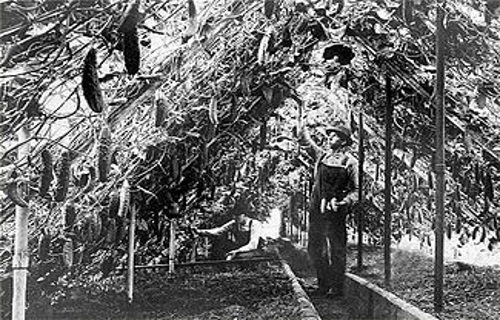
Corn Growth
Corn needs a spot with that gets full sun and has fertile, well-drained soil with a pH of 6.0 to 6.8. Seedlings can be set out as soon as the last spring frost has passed. Space plants 8 to 12 inches apart. In case of a surprise late frost, be prepared to cover seedlings with a fabric row cover. In cold climates you can plant in a raised bed covered with black or IRT plastic (infrared transmitting plastic) that will warm the soil. If possible, lay the plastic a week or so before planting.
Plan to fertilize twice because corn is a hungry plant. Before setting out seedlings, amend the soil with compost and mix a balanced organic or timed-release fertilizer into the soil. About a cup of 10-10-10 per 10 feet of row is a good general rate, but be sure to check and follow rates given on the label of any fertilizer you are using. About 6 weeks or so later, when the plants start to produce tassels, fertilize them again. (If you amend the soil with cottonseed meal or other high-nitrogen amendment, it may not be necessary to feed the second time.) Use a hoe or trowel to mix the fertilizer into the top inch of soil between the plants. After this booster feeding, water your corn once or twice weekly if the weather is hot and dry.
Normal plants should grow fast with dark green healthy leaves. Corn will tell you if it is hungry by turning very light green. If so, feed again.
Corn grows fast and needs lots of water to grow properly. It also has shallow roots that make it susceptible to drought. Soaker hoses will insure that your corn gets the water it needs. However, for a large planting, soaker hoses may not be practical.
Corn storage
Corn storage capacity, already insufficient in many areas, would be further stretched by the volume of corn anticipated this year. As a consequence, more corn will be stored in existing structures such as silos, machinery storage buildings, warehouses, or even livestock buildings. These structures can be used successfully for short-term storage of cool, dry grain if good management practices are used — that is, if the grain is in good condition when placed in storage and the challenges of grain handling, aeration and pest control can be met. If grain in temporary storage is managed improperly, much of it could be lost to molds, rodents and insects.
Conventional corn storage bins have clear advantages: they are rainproof, vented, and resist insects, animals and other pests. Temporary grain storage structures may share all, or none of these characteristics.
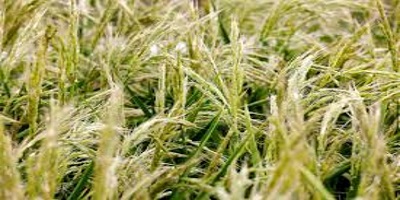
Grow Barley
Nutritious, delicious and easy to cultivate, barley is a common sweet grain with loads of health benefits and a variety of purposes. Barley takes little time and energy, grows quickly and is quite cheap. Even black thumbs can successfully sprout this wholesome grain.
Barley grows best in cool ground–ideal temperatures hover right around freezing.
For winter barley, October is the best time to plant. For spring barley, plant in January.
Sow the seeds in the rows, ensuring that there are 20 to 25 seeds per square foot of space.
Grow barley as you would wheat. Some varieties are spring planted and some are fall planted. Barley ripens sooner than wheat; spring-planted barley ripens in 60 to 70 days, fall-planted barley about 60 days after spring growth begins. Barley thus fits well into a double-cropping scheme and a variety of crop rotations. Be careful when planting barley with a drill because bearded varieties may cause planting tubes to clog.
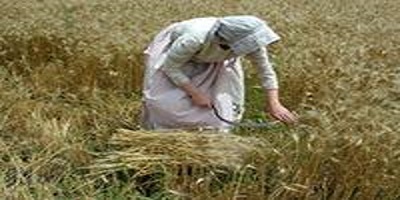
Barley is harvested the same as wheat: cut, bundled and shocked to dry. Wear a shirt when harvesting barley as the awns can irritate your skin. Barley may be stored in the bundle and fed to stock without threshing.
Grow Oat
Oats have numerous uses in food; most commonly, they are rolled or crushed into oatmeal, or ground into fine oat flour. Oatmeal is chiefly eaten as porridge, but may also be used in a variety of baked goods, such as oatcakes, oatmeal cookies, and oat bread. Oats are also an ingredient in many cold cereals, in particular muesli and granola. Oats may also be consumed raw, and cookies with raw oats are becoming popular.
Oats are also occasionally used in several different drinks. In Britain, it is used for brewing beer. Oatmeal stout is one variety brewed using a percentage of oats for the wort. The more rarely used Oat Malt is produced by the Thomas Fawcett & Sons Maltings and was used in the Maclay Oat Malt Stout before Maclay ceased independent brewing operations. A cold, sweet drink made of ground oats and milk is a popular refreshment throughout Latin America.
Oats are also commonly used as feed for horses – as plain whole or rolled oats or as part of a blended food pellet. Cattle ared oats either whole, or ground into a coarse flour using a roller mill, burr mill, or hammer mill.Oat straw is prized by cattle and horse producers as bedding, due to its soft, relatively dust-free, and absorbent nature. The straw can also be used for making corn dollies. Tied in a muslin bag, oat straw was used to soften bath-water.
Seeds should be grown outdoors, sow the seeds of wild oats at a depth of 6mm at the beginning to middle of spring. Seedlings of wild oats can be purchased; annual varieties should be planted in the early spring, whereas perennial varieties can be planted either in the early spring or in autumn.
Depending on the variety wild oats seedlings should be planted 25 to 30cm apart (small) or 45 to 60cm apart (larger varieties of oat). They should be planted in an area that receives full sunlight in a dry soil with a pH of 6 to 7.5.
Keep the ground moist to allow the seeds to germinate. Continue to do so as the plants begin to grow. The compost or manure should help the oats retain moisture, but it will be necessary to water them periodically whenever the soil begins to dry out. If the area you live in gets plenty of rain, however, you may not need to water your oats at all.
Grow Potatoes
Plant the potato tubers as early as possible, around March 15 is ideal. Mid-season and late varieties such as Red Pontiac and White Kennebec can be planted up to July 4th with some success. You can cut potatoes into pieces, each piece should have no more than three eyes.
Plant potatoes in full sun, in loose, loamy soil. Fertilize before planting, using 1/4 cup 5-10-5, 10-10-10 or similar general fertilizer for every foot of your potato row. Mix fertilizer into the soil thoroughly, cut pieces should not come in contact with the fertilizer.
Plant each potato tuber or piece 3″ deep, 12″ apart, in rows spaced 2′ apart.
After the plants emerge, gradually build up a mound of loose soil around the plants to a height of about 4 to 6 inches. This is referred to as “hilling up” the potatoes. Apply mulch over this mound to a depth of 6 inches, using dry (brown) grass clippings, straw, or compost. This encourages tuber production, prevents sunburned potatoes and keeps the soil cool.
Water regularly during dry spells and cultivate the soil to keep weeds down.
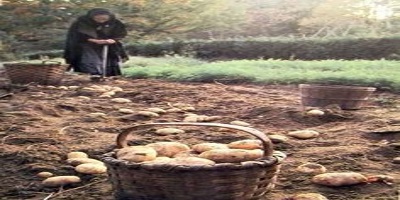
You can harvest “new” potatoes (very small, immature potatoes) about two weeks after the plants begin to flower (mid-July). Harvest the rest of the potatoes when the plants die and turn brown, in August or September. Dig carefully to avoid damaging the tubers. Let the potatoes dry outside for a few hours, then bring inside and store in a cool place.
RELATED : 24 Lost Gardening Tips from 100 Years Ago
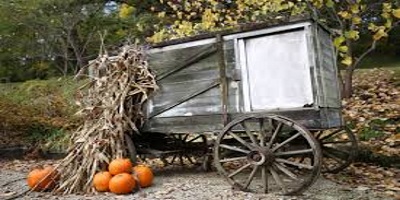
Grow Pumpkins
Soil, Water and Planting Spot:
Pumpkins love good rich composted soil that drains well but also hold moister (Loamy soil), lots of organic matter should be worked into the soil. The perfected soil pH is between 6.0-7.0, so check your soil before planting.
Pumpkins love lots and lots of sun, so pick an area with 8 plus hours of direct sunlight a day.
They require heavy and even watering (because of shallow roots), mulching around them will help hold moister in those hot dry times, Trickle irrigation is best, but soaker hoses also work well. Overhead sprinklers are effective; however, wet foliage increases the chance of disease, especially mildew.
If you have amended the soil right you shouldn’t have to fertilize more than once a week and just an multipurpose fertilizer will work.Giant pumpkin vines require approximately 2 pounds nitrogen, 3 pounds phosphorous and 6 pounds potash per 1,000 square feet of growing space.
Planting and Growing:
Pumpkins have a very long growing season, some verities up to 120 days (4 months). So start them indoors 3-4 weeks before YOUR last frost or wait til the soil is 70 degrees to direct plant seeds.
Pumpkins are very sensitive to temperature, so always be prepared to cover them in the early season to protect from cold night or even cold days. They grow best when days an nights are above 70 degrees.

Grow Carrots
Plant your carrots in rows that are 1 to 2 feet apart is the best way how to grow carrots. Seeds should be planted about a ½ inch deep and 1 to 2 inches apart. When growing carrots in the garden, you’ll wait for your carrot plants to appear. When the plants are 4 inches high, thin the plants to 2 inches apart. You may find that some of the carrots are actually large enough to eat. Thin the carrots regularly to 4 inches apart. When growing carrots in the garden, make sure to plant, per person, five to ten feet of row to have enough carrots for table use. You will get about one pound of carrots in a one foot row. You want to keep your carrots free of weeds when growing carrots in the garden. This is never more so than when they are small. The weeds will take nutrients away from the carrots. This will cause poor carrot development.
Harvest can begin when carrots are finger size. In general, the smaller carrots are juicier and more tender. You do not have to harvest the entire crop at once. They can remain in the soil until you are ready to use them. Carrots will last until winter in the soil if mulched well. Carrots are best stored at temperatures near freezing in a moist environment.

Grow Cucumbers
Grow cucumbers where a long, warm growing season, minimum 65 days, can be assured. Cucumbers are a warm-season crop, very tender to frost and light freezing. Cucumbers are difficult to grow where there are foggy, damp summers, as the plants are subject to mildews.
If you are planning to rotate your crops, cucumbers often do well following cabbage family crops. Another intercropping technique is to seed crimson clover between cucumber rows just as the plants begin to “run” (send out vines). The clover will germinate and grow beneath the cucumber vines and will become well-rooted before winter. Cucumbers do tend to take up a large amount of space, try vertical gardening with a trellis capable of supporting the weight of mature cucumbers to help maximize available garden space.
Once cucumbers start growing they must have a constant supply of soil moisture. If it is lacking, the plants stop growth in a “holding position” until there is more soil moisture. It is therefore important to grow cucumbers near a water supply. Keep weeds down with shallow cultivation or by growing the vines on black plastic mulch. As an alternative rows can be mulched heavily with straw, salt hay, grass clippings, or partially rotted compost. When the plants are about 4 inches high, add a high-nitrogen fertilizer such as blood meal or cottonseed meal, or water the plants with fish emulsion.
Don’t freeze cucumbers. The best long term storage solution for cucumbers is to pickle them. There are particular varieties of cucumber that are best suited to pickling, however, any variety can be pickled. Cucumbers can be pickled by fermenting or with a vinegar solution, then processed in a boiling water bath.
Pickled cucumbers can keep for up to a year.
Cucumbers Produce very low amounts of ethylene, but they are very ethylene sensitive. Because of this, cucumbers should never be stored with high ethylene producers like apples, pears, or tomatoes.
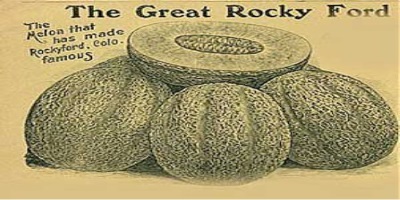
Growing Cantaloupe and Honeydew Melons
Cantaloupe and honeydew melons thrive in warm soil. Don’t plant until the ground temperature is above 70 degrees F, which typically occurs about the time peonies bloom in northern zones. Prior to planting, cover soil with plastic film to hasten soil warming. Because cantaloupes and honeydew are heavy feeders, prepare your planting bed well. The quick way is to plant in soil amended with 4 to 6 inches of compost or well rotted manure, if available.
Melons need room to roam. Space plants 36 to 42 inches apart. Or, to save space, plant melons 12 inches apart at the base of a trellis. When trellising melons, tie vines to the trellis daily, using soft plant ties that won’t crush stems. A trellis for cantaloupe should be large: up to 8 feet tall and 20 feet wide in warmest climates. Wire fencing works well. Trellising offers several advantages: Vines get better air circulation than on the ground, which reduces the chances of disease. In northern zones, vines also get more sunlight when on a trellis that’s positioned at a slant toward the sun. You can also place a trellis against a bright reflective surface, which increases the amount of light reaching leaves and confuses melon aphids, who like to hide on the shadowy undersides of leaves. If you use a trellis, anchor it firmly so gusty summer winds don’t topple the vine-covered trellis.
After planting in spring you can cover plants with floating row covers to exclude insects and trap warm air near plants; this is most important in cooler climates but is useful everywhere to keep certain pests off the plants. In cool climates you can also lay out a permeable black tarp or black landscape fabric over the area to help trap the sun’s warmth.
Water may be the most important variable that you supply; melons need a steady supply. Vines are most sensitive to drought during the time between transplanting and when fruits start to form. Keep soil consistently moist but not waterlogged, which will kill plants. It’s typical for leaves to wilt under midday sun, but they shouldn’t remain wilted into the evening. If possible, avoid overhead watering. Soaker hoses and drip irrigation deliver water directly to the soil, preventing possible spread of fungus diseases on wet foliage. If you must use a sprinkler, then water vines very early in the morning so that leaves can dry early, which helps prevent fungus diseases.
To harvest a honeydew you don’t plan to use immediately, leave about an inch of stem attached to keep the melon from rotting.
Store melons in the refrigerator for up to a week. If you have extra melons on hand, dice or cut the flesh into balls and freeze for slushies or cold soup.
Pioneer women also made pickles, relishes and chutneys from the produce of their vegetable gardens. The primary constituents of these condiments were vinegar, sugar, dill, cucumbers, onions, cauliflower and tomatoes that they grew in their gardens. Sometimes other herbs or spices were used as well as raisins which were common in the pantries of early kitchens.
Our grandfathers had more knowledge than any of us today and thrived even when modern conveniences were not available. They were able to produce and store their food for long periods of time. The Lost Ways is the most comprehensive book available. All the knowledge our grandfathers had, in one place.Here’s just a glimpse of what you’ll find in the book:
Table Of Contents:
Making Your Own Beverages: Beer to Stronger Stuff
Ginger Beer: Making Soda the Old Fashioned Way
How North American Indians and Early Pioneers Made Pemmican
Wild West Guns for SHTF and a Guide to Rolling Your Own Ammo
How Our Forefathers Built Their Sawmills, Grain Mills,and Stamping Mills
How Our Ancestors Made Herbal Poultice to Heal Their Wounds
What Our Ancestors Were Foraging For? or How to Wildcraft Your Table
How North California Native Americans Built Their Semi-subterranean Roundhouses
Our Ancestors’Guide to Root Cellars
Good Old Fashioned Cooking on an Open Flame
Learning from Our Ancestors How to Preserve Water
Learning from Our Ancestors How to Take Care of Our Hygiene When There Isn’t Anything to Buy
How and Why I Prefer to Make Soap with Modern Ingredients
Temporarily Installing a Wood-Burning Stove during Emergencies
Making Traditional and Survival Bark Bread…….
Trapping in Winter for Beaver and Muskrat Just like Our Forefathers Did
How to Make a Smokehouse and Smoke Fish
Survival Lessons From The Donner Party
Get your paperback copy HERE

Here’s just a glimpse of what you’ll find in The Lost Ways:
From Ruff Simons, an old west history expert and former deputy, you’ll learn the techniques and methods used by the wise sheriffs from the frontiers to defend an entire village despite being outnumbered and outgunned by gangs of robbers and bandits, and how you can use their wisdom to defend your home against looters when you’ll be surrounded.
Native American ERIK BAINBRIDGE – who took part in the reconstruction of the native village of Kule Loklo in California, will show you how Native Americans build the subterranean roundhouse, an underground house that today will serve you as a storm shelter, a perfectly camouflaged hideout, or a bunker. It can easily shelter three to four families, so how will you feel if, when all hell breaks loose, you’ll be able to call all your loved ones and offer them guidance and shelter? Besides that, the subterranean roundhouse makes an awesome root cellar where you can keep all your food and water reserves year-round.
From Shannon Azares you’ll learn how sailors from the XVII century preserved water in their ships for months on end, even years and how you can use this method to preserve clean water for your family cost-free.
Mike Searson – who is a Firearm and Old West history expert – will show you what to do when there is no more ammo to be had, how people who wandered the West managed to hunt eight deer with six bullets, and why their supply of ammo never ran out. Remember the panic buying in the first half of 2013? That was nothing compared to what’s going to precede the collapse.
From Susan Morrow, an ex-science teacher and chemist, you’ll master “The Art of Poultice.” She says, “If you really explore the ingredients from which our forefathers made poultices, you’ll be totally surprised by the similarities with modern medicines.” Well…how would you feel in a crisis to be the only one from the group knowledgeable about this lost skill? When there are no more antibiotics, people will turn to you to save their ill children’s lives.
If you liked our video tutorial on how to make Pemmican, then you’ll love this: I will show you how to make another superfood that our troops were using in the Independence war, and even George Washington ate on several occasions. This food never goes bad. And I’m not talking about honey or vinegar. I’m talking about real food! The awesome part is that you can make this food in just 10 minutes and I’m pretty sure that you already have the ingredients in your house right now.
Really, this is all just a peek.
The Lost Ways is a far–reaching book with chapters ranging from simple things like making tasty bark-bread-like people did when there was no food-to building a traditional backyard smokehouse… and many, many, many more!
Books can be your best pre-collapse investment.
The Lost Ways (Learn the long forgotten secrets that helped our forefathers survive famines,wars,economic crisis and anything else life threw at them)
Survival MD (Best Post Collapse First Aid Survival Guide Ever)
Conquering the coming collapse (Financial advice and preparedness )
Liberty Generator (Build and make your own energy source)
Backyard Liberty (Easy and cheap DIY Aquaponic system to grow your organic and living food bank)
Bullet Proof Home (A Prepper’s Guide in Safeguarding a Home )
Family Self Defense (Best Self Defense Strategies For You And Your Family)
Survive Any Crisis (Best Items To Hoard For A Long Term Crisis)
Survive The End Days (Biggest Cover Up Of Our President)