
The Best Way to Grow Sweet Potato in Straw Bales, Bags and Containers
Sweet Potato in Straw Bales
An experiment at best, we try to grow sweet potato in straw bales. We think it’ll work great and give us long healthy potatoes, we shall see!!!
# Spread newspaper or landscape fabric over the ground where you will place the bales to help block sprouting weeds if the site has bare soil or other vegetation is already present. Position the newspaper and bales where they will receive at least six hours of sunlight daily. Make sure you place them where you will not have to move them again once they are saturated and heavy.
# Water the bales, as needed, so they remain constantly moist for three days. This is the first step of a conditioning process only necessary for new bales.
# Apply a nitrogen fertilizer with a formula like 46-0-0 at a rate of 1/2 cup per bale or 21-0-0 at a rate of 1 cup per bale and water it into the bale each day for three days beginning on the fourth day of conditioning. When you water the fertilizer in, provide enough water that the fertilizer moves into the bale but not so much that water and fertilizer run out of the bale.
# Cut the quantity of fertilizer supplied in half and sprinkle this quantity over each bale each day for three additional days, watering it in each time.
#Irrigate the bale daily for two days following the six days of fertilizer applications, keeping it constantly moist. After two days, stick your hand into the bale as far as possible. If the bale is cooler than body temperature, it is ready for planting. If it is warmer, continue to water it and check daily until it has cooled sufficiently. Old, year-old bales do not require this conditioning, which is necessary to encourage decomposition prior to planting and to prevent injury to young plants.
#Make a hole for each sweet potato seed piece or slip with a hand trowel, tool handle or gloved hand. Each hole should extend at least about 4 inches into the straw bale and offer a similar width. Space the holes about 12 to 14 inches apart so each bale has no more than four plants.
Easy and cheap DIY the best system to grow your organic and living food bank
#Fill each hole with well-rotted compost or high-quality potting soil.
# Plant a sweet potato seed piece or slip in each prepared hole, gently firming the compost around it.
#Water the straw bale regularly, often daily, so the bale and sweet potato roots never dry out completely.
#Fertilize the sweet potatoes in the straw bales about every one to two weeks with a diluted, complete fertilizer, liquid fish emulsion or compost tea. Monitor the plants for signs of nutrient deficiencies, and adjust the frequency or quantity of fertilizer applications or select a different fertilizer, if needed. Nitrogen deficiency appears as a yellowing of older leaves, inadequate potassium causes leaf edges to turn brown and insufficient phosphorus gives leaves a purplish color.
#Gently dig through the straw bale as the end of the growing season nears or when you want to begin harvesting the sweet potatoes, working from the top of the bale down. You do not need to harvest all of the sweet potato tubers at once but can remove them individually as you use them. Growing in straw bales may permit earlier harvest, but the yield may be less than traditionally grown plants, depending on the care provided. This cultivation method is employed primarily when in-ground growing is not feasible or desired.
RELATED : Single Plant that Grows Both Tomatoes and Potatoes at the Same Time
Sweet Potatoes In Containers
I usually dig my sweet potatoes here in the midwest after the frost have killed off the sweet potato plants.. which can be anywhere from Sept – Nov months.. you want to dig them before the ground freezes..
I believe it is best when curing and storing the sweet potatoes is to leave them unwashed until you choose to eat them.
Sweet potatoes are warm-season plants that are very sensitive to cold temperatures. The tuberous roots should be harvested by the time frost kills the vines or soon thereafter. Sweet potato roots continue to grow until frost kills the vines. Roots can be left in the ground for a short while; however, an extremely hard frost can cause damage to roots near the surface. Chilling injury also results to roots when soil temperatures drop to 50°F or lower, and this can result in internal decay in storage. The greatest danger from delayed digging is the risk of cold, wet soil encouraging decay of the roots.
Don’t wait until food becomes scarce; start preparing for the future now by becoming as self-reliant as possible. Your long-term chances of survival could very well depend on your ability to feed yourself and your family without relying on someone else.
Depending on how early you were able to plant, you may find an assortment of “baby baker” or smaller roots, as well as full-size potatoes. Although you can cook newly dug sweet potatoes right away, their flavor and storage quality is greatly improved by curing at warm temperatures first. It is during the curing process that starch is converted to sugar.
Care should be taken during digging and handling to avoid skinning and bruising the roots. Even a small wound can easily become infected with decay organisms. Line containers with rags or other soft material, if possible, to avoid scratching the roots. Do not store badly injured or diseased roots. Although large amounts of soil clinging to roots during storage is not desirable, sweet potatoes are easily damaged during the washing process when freshly dug. Allow roots to dry and cure before removing excess soil.
Cure sweet potatoes by holding them for about 10 days at 80-85°F and high relative humidity (85-90 percent). In the absence of better facilities, they can be cured near a furnace to provide warmth. If the temperature near your furnace is between 65-75°F, the curing period should last 2-3 weeks. To maintain the required high humidity (85-90 percent relative humidity), stack storage crates or boxes and cover them with paper or heavy cloth. Packing in perforated plastic bags will also keep humidity high, yet the perforations will allow excess moisture to escape.
Once the sweet potatoes are cured, move them to a dark location where a temperature of about 55-60°F can be maintained during storage. Sweet potatoes are subject to chilling injury, so keep them out of the refrigerator. Outdoor pits are not recommended for storage because the dampness encourages decay. Good results can be obtained by wrapping cured sweet potatoes in newspaper and storing them in a cool closet.
RELATED : The Best 5 Gardening System to Grow Food for all Your Family Every Year Even in a Desert
Sweet Potato in Bags
Growing from Slips
Growing sweet potato bought from shop. Do not plant the whole potato in the ground, instead grow slips, them root them before putting in the ground. Potato is placed in water to root, them slips will start to grow,cut these slips and place in water to root, then plant the rooted slips into ground.
Discover how our grandfathers used to preserve food for long periods of time.
Preparing the Beds
In the north, it is really important that you prepare your beds so the soil is nice and warm. The first year, I planted at the end of June and used plastic trash bags to keep the soil warm. Many people buy plastic mulch to keep the soil warm.
I prepared the bags early with half compost and half garden soil. Then, I cover the tops of the bags with black fabric to keep the soil warm.
Inserting Slips in the bags
Unlike beds, no mounding is required. Simply take a pencil and make a hole. Then slide the slip right in. Give your new baby a drink of water and cover up the soil with black fabric or plastic mulch.
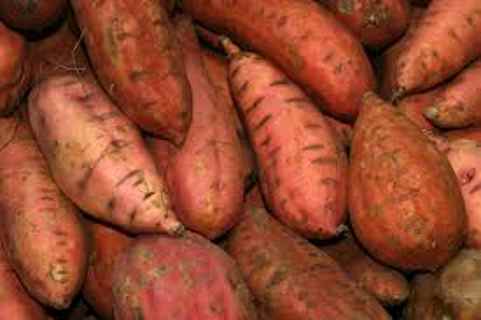
My sweet potato harvest. I planted them in April in sand and sawdust and fed them with the Mittleider weekly feed mineral fertilizer. I really didn’t do much more than that but the sweet potato harvest was amazing! Sweet potatoes are highly nutritious and store well when cured properly. This is a great preparedness food.
Sweet Potato Harvest: 139 lbs from 3 Potatoes
“Cure sweet potatoes by holding them for about 10 days at 80-85°F and high relative humidity (85-90 percent). In the absence of better facilities, they can be cured near a furnace to provide warmth. If the temperature near your furnace is between 65-75°F, the curing period should last 2-3 weeks. To maintain the required high humidity (85-90 percent relative humidity), stack storage crates or boxes and cover them with paper or heavy cloth. Packing in perforated plastic bags will also keep humidity high, yet the perforations will allow excess moisture to escape.
Once the sweet potatoes are cured, move them to a dark location where a temperature of about 55-60°F can be maintained during storage. Sweet potatoes are subject to chilling injury, so keep them out of the refrigerator. Outdoor pits are not recommended for storage because the dampness encourages decay. Good results can be obtained by wrapping cured sweet potatoes in newspaper and storing them in a cool closet.
The old fashion way, like our fore-fathers did it and succeed long before us, because what lies ahead of us will require all the help we can get. Watch this video and learn the 3 skills that ensured our ancestors survival in hard times of famine and war.
Other useful resources:
The Lost Ways (Learn the long forgotten secrets that helped our forefathers survive famines,wars,economic crisis and anything else life threw at them)
Survive Attack to Our Power Grid System (Weapon That Can Instantly End Modern Life in America)
Survival MD (Best Post Collapse First Aid Survival Guide Ever)
Backyard Innovator (A Self Sustaining Source Of Fresh Meat,Vegetables And Clean Drinking Water)
Blackout USA (EMP survival and preparedness)
Conquering the coming collapse (Financial advice and preparedness )
Liberty Generator (Build and make your own energy source)
Backyard Liberty (Easy and cheap DIY Aquaponic system to grow your organic and living food bank)
Bullet Proof Home (A Prepper’s Guide in Safeguarding a Home )
Family Self Defense (Best Self Defense Strategies For You And Your Family)
Survive Any Crisis (Best Items To Hoard For A Long Term Crisis)
Survive The End Days (Biggest Cover Up Of Our President)
Drought USA(Discover The Amazing Device That Turns Air Into Water)